According to the World Health Organization, over 2.5 billion people globally need one or more assistive technologies. Apple’s text-to-speech features like Speak Screen, is one such example. Apple’s Accessibility mode has gotten an update with the latest iOS 26, iPadOS 26, and macOS Tahoe 26 updates (available in beta) that offer a clutter-free view, same as Safari’s Reader Mode.
You can change font type, size, color, spacing, and more with the new Accessibility Reader. The Reader app can also read text aloud, you will be able to change text-to-speech voice, and tinker with other playback settings.
Whether you have vision challenges, cognitive differences, or just want a simpler reading interface, the new accessibility reader feature will make your life easier. Let’s break down how you can set it up and use it.
How to Use Accessibility Reader on iPhone and iPad?
The Accessibility Reader on iOS and iPadOS is accessible directly through Safari and compatible apps like Apple News. But if you want to set it up for all the apps, here’s how to do so:
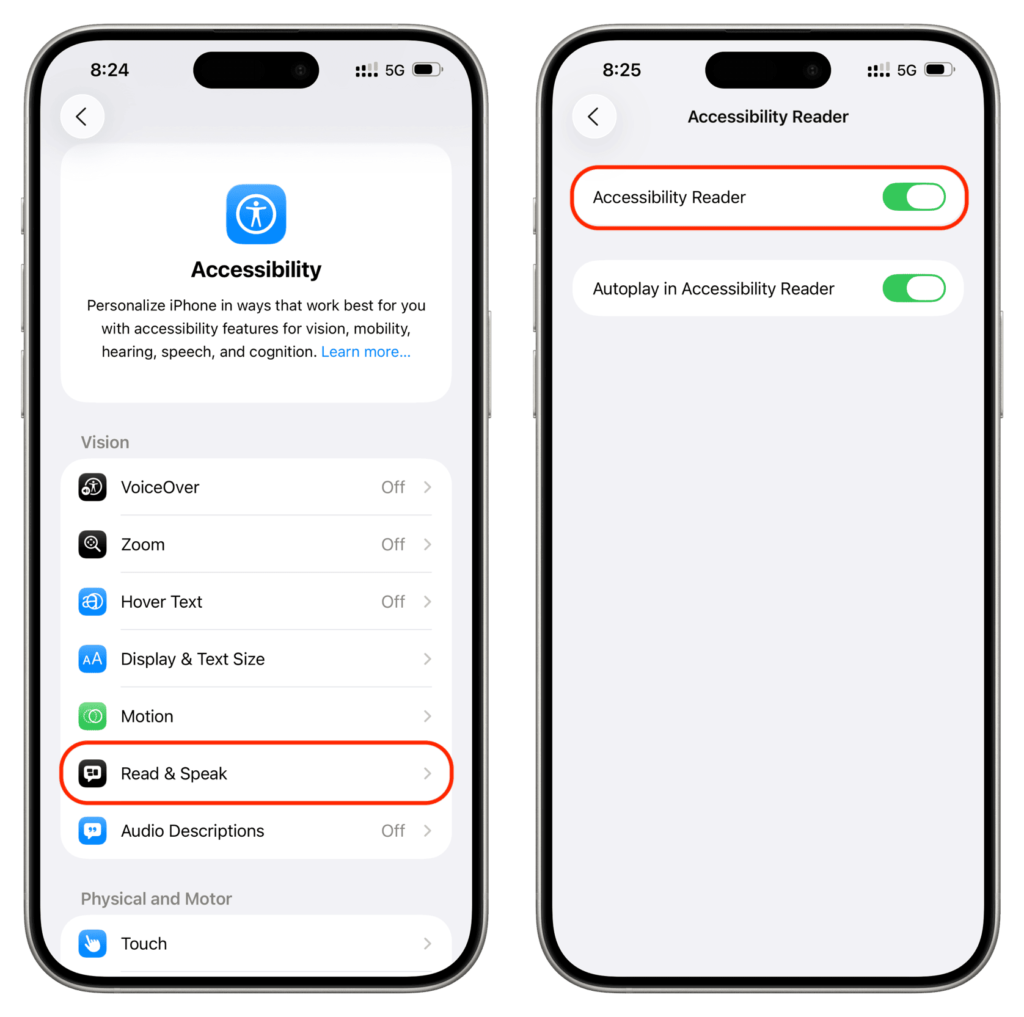
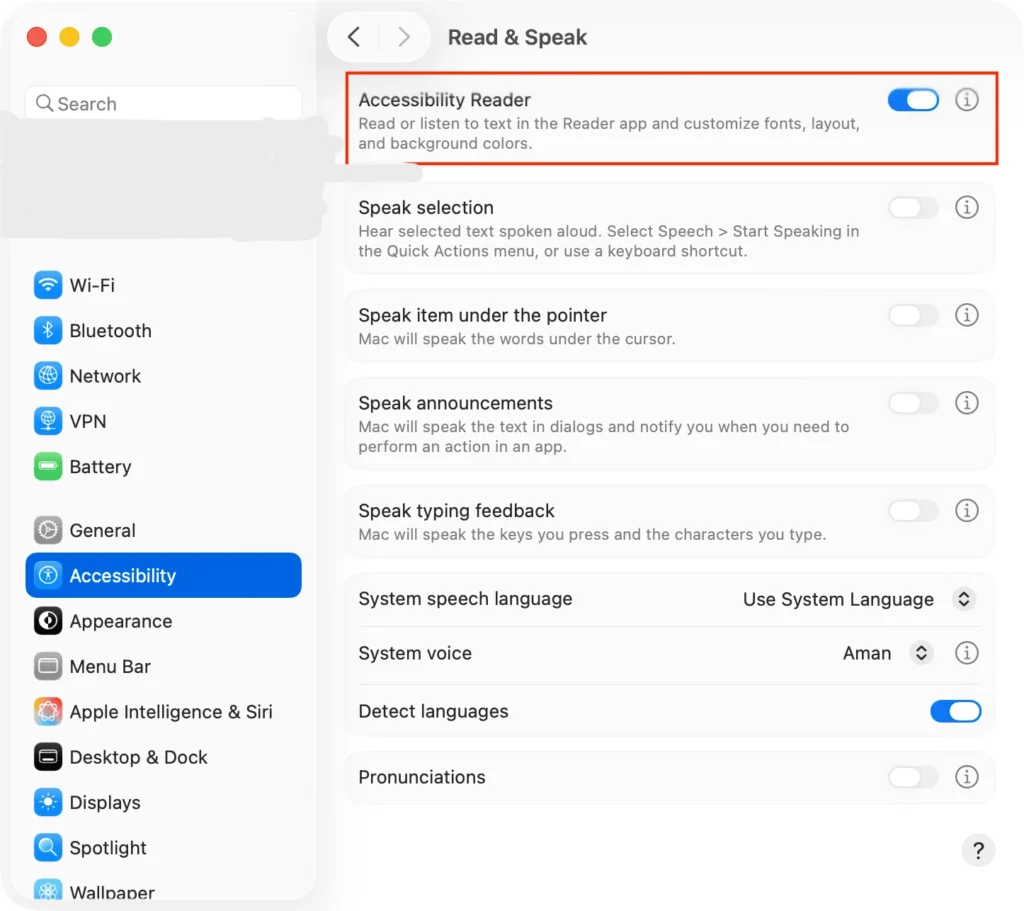
- Open the Settings app and go to Accessibility > Read & Speak > Accessibility Reader, then toggle the switch on.
- Open any app that displays some text, then triple-click the power button to turn on Accessibility Reader.
- The app will then open in full screen mode and show you in-app text in the raw form. You can read the text without any distractions.

- If “Autoplay in Accessibility Reader” is turned on, you’ll see audio controls at the bottom of your screen. You can pause the spoken text, skip forward or rewind by 10 seconds. You can also choose the speaking rate.
How to Customize Accessibility Reader Text?
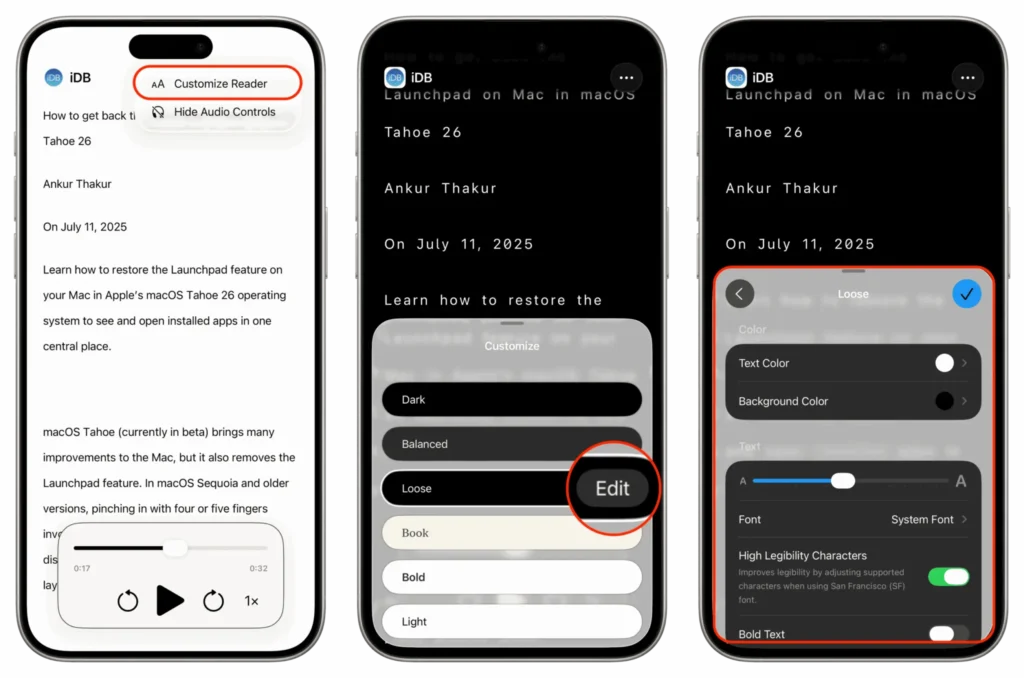
Once the reader opens in full screen mode, you can customize it as you want. Tap the 3-dotted icon in the top right side of your screen, click on Customize Reader in the menu, then choose one of the preset options (Dark, Balanced, Loose, Book, Bold, or Light). If the presents don’t appeal you, you can personalize it by clicking on Edit.
You can personalize all these settings:
- Text and background color
- Text size
- Font type
- Bold text
- Line, word, and character spacing
- Link style and color
- Text highlight color
- Text highlight style (gradient, background, or underline)
Accessibility Reader can highlight the text when speaking it aloud. The text highlight style when using this text-to-speech feature.
Audio Controls in Accessibility Reader
Tap the Play button in Accessibility Reader’s audio settings to hear how the spoken text would sound like. If you want to make the text spoken aloud the default setting, turn on the “Autoplay in Accessibility Reader”. After you turn it on, Accessibility Reader will continue reading the text aloud in the background, even if you lock your iPhone.

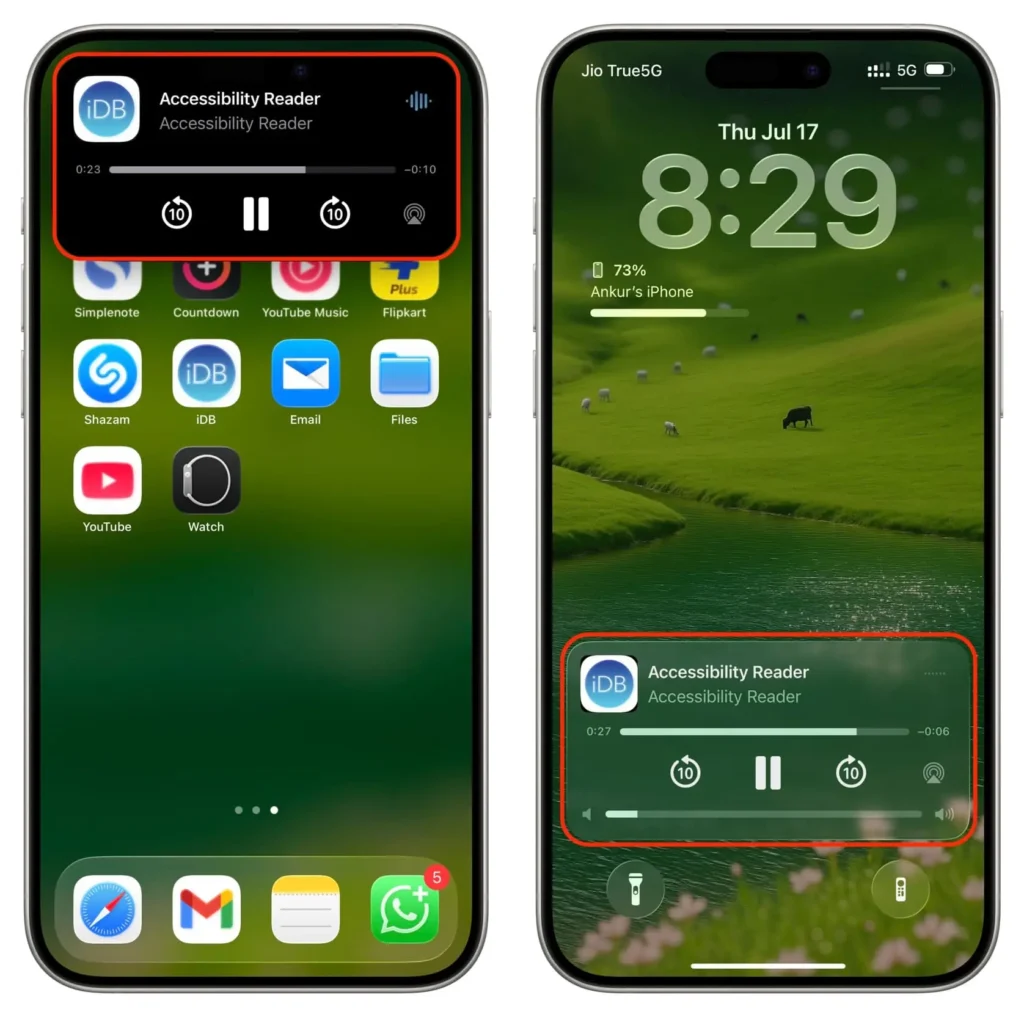
You can customize the audio controls when the Accessibility Reader comes at the bottom of your screen by clicking on the 3-dotted button and then choosing Hide Audio Controls. This will make more room on your screen for text.

Keep in mind that hiding the audio controls will not stop text-to-speech if it was running. You can also access these controls from the Dynamic Island and the Lock Screen.
How to Use Accessibility Reader on Mac?
Here’s a step by step breakdown of how to use Accessibility Reader on your Macbook:
- Click on the Apple menu and choose System Settings > Accessibility from the sidebar. On the right side, click on Read & Speak and turn on Accessibility Reader.
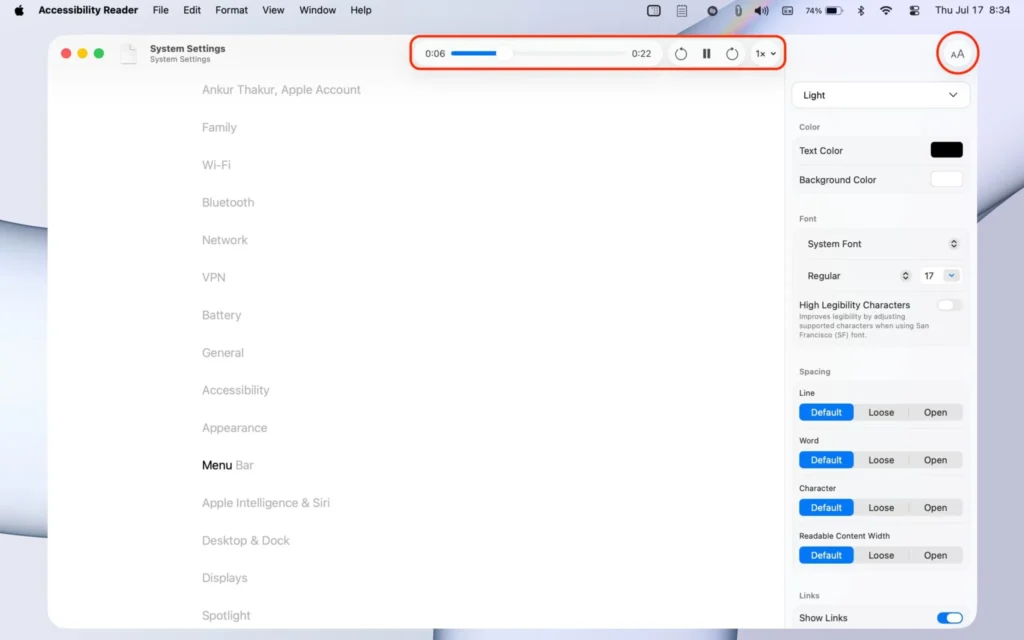
- Open any app on your Mac that shows text, then press Command + ESC keys to activate Accessibility Reader. The built in Reader app will automatically show text from the app without any distractions. If it doesn’t, choose the text under “Suggestions” heading. To hear it spoken aloud, use playback controls at the top. To customize your reading experience, click on the AA icon.
- After the settings are applied, close the Reader window or Quit the app from the menu.
How to Change the Accessibility Reader Voice?
The default voice for Accessibility Reader will be the same as Speak Screen, Speak Selection, and any other accessibility features. If you want to change the “text-to-speech” voice, you can do it by following these steps:
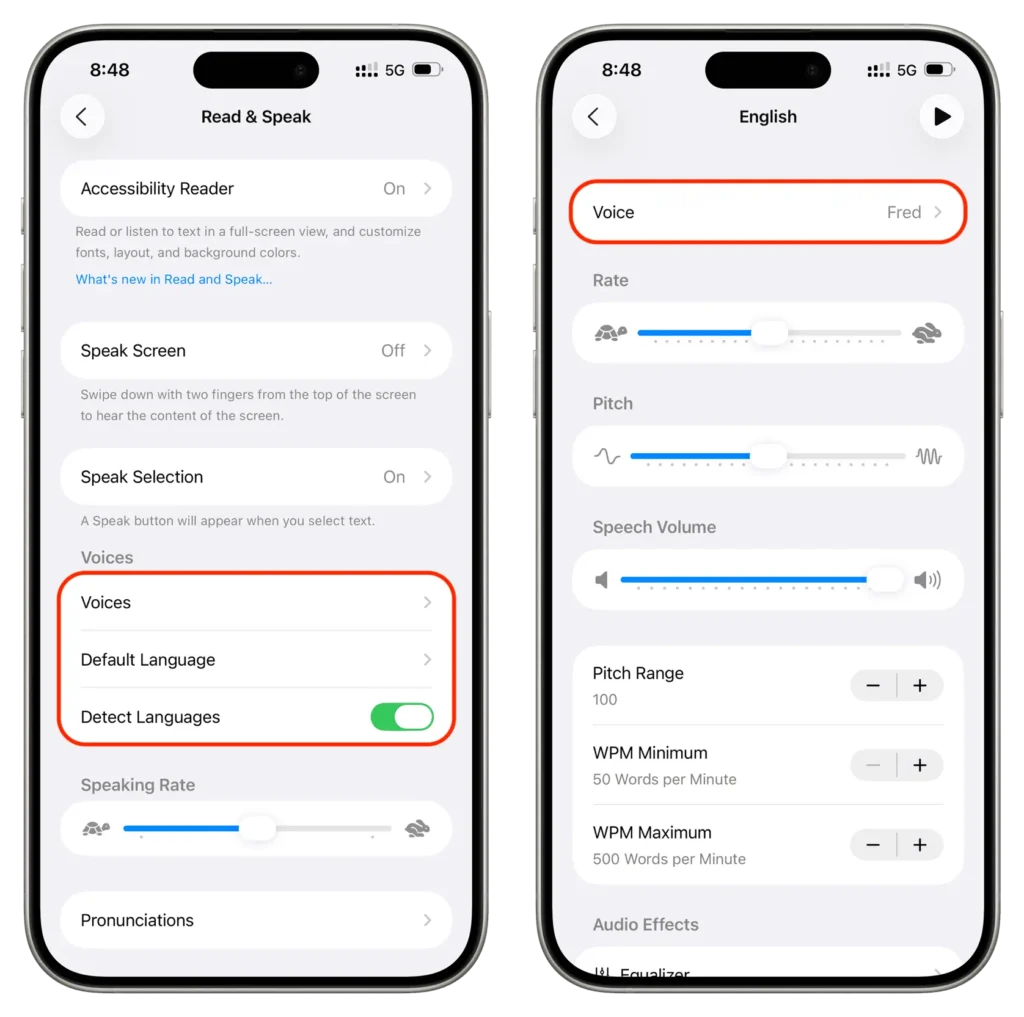
- Settings > Accessibility > Read & Speak > Voices > Select Your Language.
Next, choose the Voice option and tap a voice. You can also create your personal text-to-speech voice that you can use.
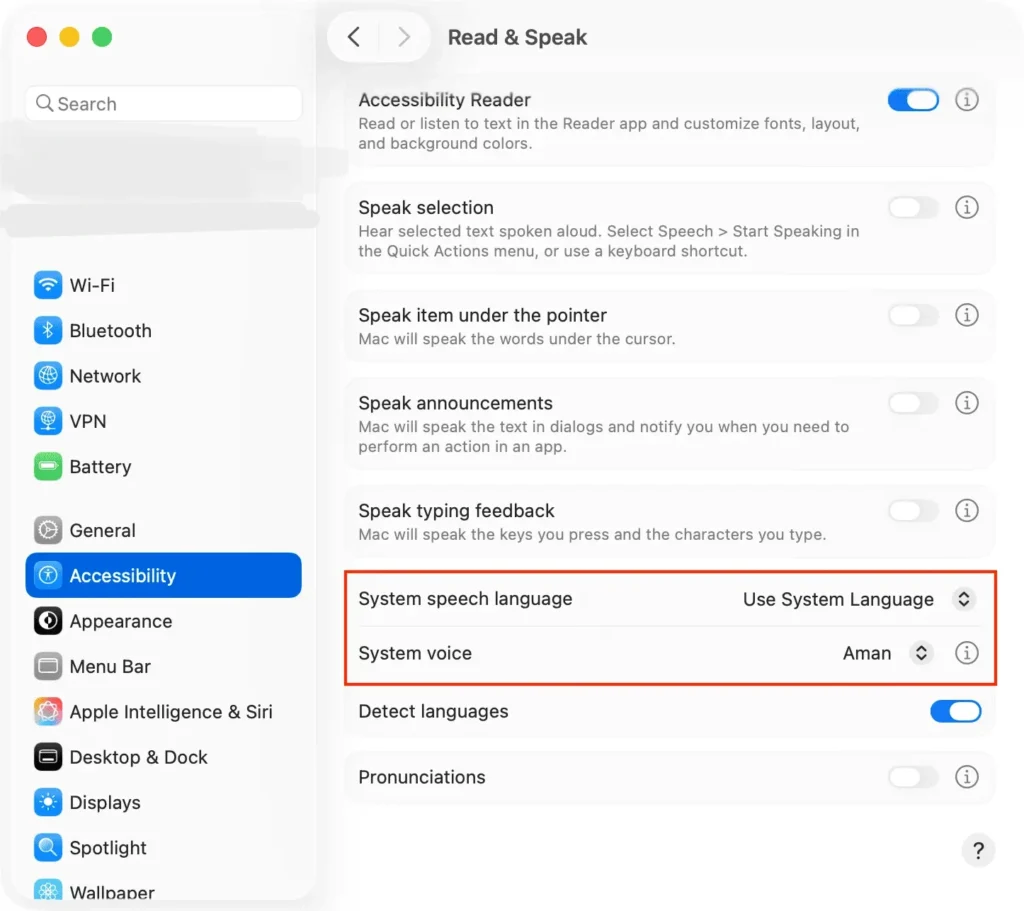
To change the text-to-speech voice for Accessibility Reader on your Mac, click the Apple menu and choose System Settings. Then, select Accessibility from the sidebar and click on Read & Speak > System Voice on the right.
Accessibility Reader vs. Traditional Reader Mode
While both simplify content, the new Accessibility Reader enhances usability with:
- Better integration with system-wide accessibility settings
- More customization options for neurodiverse and low-vision users
- Easier navigation and more customization options
- Consistent experience across iPhone, iPad, and Mac
Who Benefits From This Tool?
Apple’s Accessibility Reader isn’t just for people with diagnosed disabilities. It’s a productivity and comfort tool for everyone. But it’s especially helpful for:
- People with dyslexia
- Individuals with low vision or color blindness
- Neurodivergent users who get distracted by cluttered layouts
- Seniors who prefer simpler visual interfaces
- Students who need focused reading environments
Tips to Get the Most Out of Accessibility Reader
Here are some practical tips to elevate your experience:
- Use dark mode or sepia background to reduce eye strain
- Pair with AirPods for seamless spoken content playback
- Bookmark articles in Safari Reading List, which supports Reader Mode by default
- Combine with Focus Mode on iOS to create a clean, distraction-free reading session
Final Thoughts
Apple’s new Accessibility Reader is an upgraded version of the old reading mode. It’s a thoughtfully designed feature that empowers users to engage with content on their own terms. Whether you’re a student needing better focus, someone with vision challenges, or just prefer a cleaner interface, this tool is a quiet revolution in digital reading. Accessibility Mode is what you need.